Tuesday, May 31, 2011

Strawberry Rhubarb Bars

So it's been a little while since I've posted, but I assure you that despite the hectic schedule I have made sure to continue baking/cooking.  One of the things that I had hoped to do was make enough new recipes that I'd eventually have a little bit of a backlog to work from for posting, but I realized that in order to do that I'd have to stop posting for a while.  Unfortunately my usual day-to-day doesn't allow me the luxury to post soon after making something, so this is the best approach for me.

Anyway, on to the main event for today.  I was grocery shopping back in March and as I was walking through the produce section, I found a package of rhubarb.  Now if you know anything about me, you know that my childhood was not very adventurous as far as new foods and ingredients (though not for lack of trying on my mother's part).  When I saw the rhubarb, I thought, "so THAT'S what it looks like!"  Without even thinking I picked up a package and figured I would find something to make. 

I knew that strawberry was a popular combo for rhubarb so I made sure to pick up a pint while I was shopping that day.  The first thing I did when I got home (okay, a few days later) was search on Beantown Baker's site and I found these bars.  When I was prepping for these I did stress quite a bit over the pan size/type.  I had a pan that I thought was what I should use (essentially a large baking sheet) but it turned out it was not the best option.  I should have used a giant jelly roll pan I have (I'll have to go back and check the sizing if anyone is interested in knowing -- hey, maybe I'll see if anyone is actually reading this thing!).  The bottom crust pressed fine into the baking sheet, but when I poured in the filling I knew it was going to overflow.  So I placed the baking sheet on/in the giant jelly roll pan, put everything in the oven, and crossed my fingers.

This was much braver than I usually am when baking; I didn't freak out nearly as much as I expected since I pretty much knew the pan size wasn't right.  I mostly hate to waste ingredients, but I figured it'd be hard not to get anything out of this, and I'm glad I kept going with it.  Even though the batter DID overflow off the sides, the bars that cooked inside the baking sheet were fantastic!  There was tart and sweet from the strawberry/rhubarb combo, but the crust and topping made for a great pastry flavor.  We ate these over the course of a week, warming in the microwave for a few seconds and topping with Cool Whip.  I took some in to work and I still have people asking about them; unfortunately rhubarb is no longer in season.  Next year!


Strawberry Rhubarb Bars
originally from Beantown Baker
makes ~ 20 bars

Crust & Topping 
1 cup butter/margarine, softened
1 cup packed brown sugar
1 tsp vanilla
2 cups AP Flour
1.5 cups quick-cooking oats
2/3 cup chopped nuts (I omitted these)
1/2 tsp baking soda
1/4 tsp salt

Strawberry-Rhubarb Filling 
2 cups granulated sugar
2/3 cup AP Flour
2 tbsp milk
4 eggs
4 cups sliced strawberries (I had about 3 cups, I think)
4 cups sliced rhubarb 

Heat oven to 375.

Make the crust first.  In a medium bowl, mix the butter, brown sugar, and vanilla with a spoon.  Stir in flour, oats, nuts, baking soda, and salt until crumbly.  (Per Beantown Baker's notes, I also ended up adding about 1 cup more of flour from the indicated list.  I didn't reflect that in my ingredients because it may vary from person to person.  Also, I used my pastry blender for this part instead of my hands -- it worked fabulously!)

Reserve 2 cups of crumbly mixture, and press the remaining amount into an ungreased 15x10x1 pan.  (I actually had a tape measure and was measuring my pan, and while it pretty much matched this, I definitely needed to go with a pan that was deeper than 1".) 

Now make the filling.  In a large bowl, mix the sugar, flour, milk, and eggs until smooth.  Fold in strawberries and rhubarb.  Spoon filling into the crust and top with reserved crumbly mixture.

Bake 40-50 minutes until topping is golden brown and filling is set.  Cool slightly, about 30 minutes.  Cut into bars (4 rows by 5) and serve with whipped cream.  Store leftovers covered in the refrigerator.


This is what rhubarb looks like.  Who knew?!

About 1/2" or so in from the edge of the crust is where the baking pan ended. Luckily I put the jelly roll pan underneath so I didn't make a mess of my oven.


Sunday, March 13, 2011

Brownies...in the Crockpot!

I have a gigantic folder of recipe bookmarks in Mozilla, and they're all broken out into various categories.  One of those categories is desserts in the crockpot, because if you didn't know this already, you can totally bake in your crockpot.  A recipe I've had saved for a while is from Stephanie's blog "A Year of Slow Cooking", and she made brownies using mugs placed in her crockpot.  Now, it takes about 2 hours and there's really nothing different about how they come out, so I have no problem admitting that there's not a huge reason for doing it this way other than it's something different to try.

I used a 10-ounce bag of Betty Crocker mix, so I was able to split the batter between two coffee mugs.  Definitely use the mugs that don't have any sentimental value, just in case something breaks.  I only had one in my cabinet so I had to go searching in our boxes of dishes in the basement.  This really was easy to do, and I think I would do this again if only because you can throw them in the crockpot before dinner instead of trying to schedule them into your cooking.  It's really difficult for them to burn too.  I think I looked at them twice in the first 45 minutes, and then I got distracted and didn't look again until I saw the clock said they had been in there for 2 hours.  Nothing was burning though, so I was confident they came out well (and they did!).

Grocery shopping has been an unfamiliar activity the past few weeks, so we didn't have any vanilla ice cream or whipped cream to serve with it.  I poured some cold milk into my brownie mug and Hubby added some low-fat Strawberry Cheesecake ice cream -- both were fantastic!  We ate ours as dessert while we watched the second disc of "Weeds" season 6.  It was pure bliss.


Brownie in a Mug Crockpot Recipe
originally from A Year of Slow Cooking
makes 2-4 brownie mugs

2 - 4 coffee mugs
Your preferred brownie mix and any associated ingredients
Cooking spray

Prepare the brownie mix according to the package directions.  Coat each much with non-stick spray and split the batter between the mugs.  Since we used a small pouch of mix and two mugs, each one was a little more than half full.

Put the mugs in the crockpot.  Cover and cook on High for 1.5 - 3 hours.

Our brownies were done at the 2-hour mark.  They were probably done a little sooner than that but I had forgotten to check them.  You'll know they're done when they've risen, the edges pull from the sides, and a knife comes out clean.

This next part is super important because it will go against your instincts -- DO NOT TOUCH THE MUGS.  They are going to be extremely hot.  Turn the crockpot off and leave them sit for a while with the lid off until they're cool to the touch.  I used a pot holder to take each of our mugs out and sit them on the wire cookie rack to cool off.

When all mugs are cool enough to be handled, top with your desired extras and dig in.


Friday, March 11, 2011

Guaranteed to Class Up Your Day!

I  just had to share these!  Two weeks ago, Hubby and I were in the SouthSide Works and had some time to kill before our dinner reservation, so we went into Sur La Table to browse.  I had never been in this store before but had been interested for a long time.  All I can say is it was a good thing that we only had 25 minutes, because I could have spent all night there and spent a whole lot of cash.  I ended up buying a bottle of Peppermint Extract (to be used soon!) and a new pair of dish gloves made by Gloveables, Inc.

When we moved into the new house in October we lost the convenience of the dishwasher as well.  The one in our rented townhouse was awful -- horribly loud and about 30 years old, but had I known that we'd end up buying a house without one, I would have been much more appreciative.  I've been wearing the standard yellow rubber gloves to wash dishes because the hot water and soap were destroying my hands, but I hated them because they were always too big and let's face it, not very snazzy.  I knew they made "fancy" dish gloves but hadn't had a chance to search the web for them, so I was very excited when I saw these at Sur La Table.  For $15.95 you have something "guaranteed to class up your day" -- I don't know about you, but I haven't found anywhere else to get that kind of assurance for less than the cost of a week's worth of Starbucks.  It was really difficult to pick a pair from their selection, but if you visit the manufacturer's website they have many more options so I was better off with the limited choice.

These gloves are great -- not only are they adorable and fabulous, but they're made for girly hands so they fit snug and comfortable, and I can actually hold dishes as I wash them.  Plus the tops of the gloves come up higher than normal ones, so it keeps the water from leaking in as it splashes in the sink (one of my main pet peeves with the regular gloves).  I highly recommend them!


Wednesday, March 9, 2011

Roasted Sweet Potato Soup

In early December my sister-in-law T gave birth to our very first nephew, J!  We have two older nieces, K and L, but this was the first boy.  We also have another nephew, N, who was born in late February.  About two weeks after J was born I was on vacation from work right before Christmas, so I drove out to my sister-in-law's house to spend the day with her, my niece L, and my new nephew J.  I also made them dinner and L helped me decorate a cake to within an inch of its life (she is 3 1/2 -- see the pictures below just for entertainment purposes, you can kind of make out some Christmas trees).


Anyhow, when I got to T's house we had lunch, which included Roasted Sweet Potato Soup that T's sister-in-law on her husband's side had made for her.  It was amazing.  We ate it with some pepper mixed in, which gave it a very mild kick to the sweetness.  This soup is very flavorful and reheats well.  We froze half the batch and I took it to work for lunch for about a week or so.  It's definitely filling with all the vegetables involved, and because it's water-based (as opposed to heavy cream) the calorie count is significantly lower.  I'm sure you could mix in some yogurt or cream if you wanted to thicken it up, but I don't think it needed it.


Roasted Sweet Potato Soup
modified from a recipe in Real Simple magazine
makes ~ 6 cups 

3 lb sweet potatoes / yams
1 Tbsp olive oil
1 apple - peeled, cored, and thinly sliced
1 stalk of celery, sliced
1 onion, diced
6 cups water
2 tsp salt
1/2 tsp pepper
1/2 cup brown sugar (or to taste)

Prick potatoes with a fork and place on a baking sheet covered with foil.  Roast potatoes at 375 degrees for one hour, or until tender.  Remove from the oven, then peel and cut into large pieces or scoop out the flesh.

Heat oil in saucepan over medium-high heat.  Add apple, celery, and onion.  Saute until tender (about 10-12 minutes), stirring occasionally.  Add water, salt, pepper, and sweet potatoes and bring to a boil.  Then simmer about 10 minutes.
*For this step I ended up putting the water and other ingredients into a separate big pot and dumped in the sauteed ingredients.  I did this so that I could use the immersion blender more easily.

Puree the soup carefully in small batches using a regular blender, or use an immersion blender directly in the pot.  Mix in the brown sugar.

Season individual servings with salt and pepper to taste.


Tuesday, February 22, 2011

Dulce de Leche Brownies

I love caramel.  Or, as Hubby says, "you love carmel".  It's quite the debate in our house.  (I would like to note that Blogger has just placed a beautiful red underline below carmel - thus proving that caramel is correct!)  It has this amazing flavor that shifts between savory and sweet.  I love eating the individual little caramels in the plastic wrappers, and my husband thinks it's gross.  More for me!

Last week I saw that Jen at Beantown Baker made dulce de leche at home.  In her crockpot.  Then I saw that the recipe came from Stephanie at A Year of Slow Cooking.  These are my two primary cooking blogs and it was like my food worlds collided in deliciousness.  Now I'm trying to get back on the weight loss track, so it's hard to justify why it's a good idea to make an entire can of dulce de leche that I will probably just want to eat with a spoon.  I went in search of a recipe to incorporate it and found one for Dulce de Leche Brownies from David Lebovitz.  Granted this is no better than eating an entire can of caramel, but at least I can take these in to work and force them on other people.

I put a 14-ounce can of sweetened condensed milk in the crockpot at about 10:30 p.m. on a Tuesday night.  The milk cooked overnight for about 8.5 hours and I took the can out at about 7:00 a.m. on Wednesday morning.  It didn't cool enough for me to open it before I left for work, so I put the can in the fridge and had to wait until that night to open it.  I couldn't wait to get home!  As I turned the can opener around the lid I got a peak of the light brown caramel and it smelled incredible.  A small taste confirmed that it had worked and I now had 14 ounces of caramel.  I ran upstairs so that my husband could taste, and needless to say he was impressed.

I have another can of milk sitting on my counter, just daring me...


Dulce de Leche
from A Year of Slow Cooking and Beantown Baker
makes 14 ounces 

1 can (14-oz) sweetened condensed milk
Water


Remove the label from the can of sweetened condensed milk.  I made only one can, but feel free to throw in however many you need (or can fit!).

Place the unopened can in the crockpot and fill with water until the can is covered.

Cover and cook on low for 8-9 hours.

Remove can with tongs very carefully.  Open when can is cool enough to the touch.  Eat until sick to your stomach, and refrigerate leftovers in an airtight container.


Dulce de Leche Brownies
recipe from David Lebovitz 
makes ~ 12 brownies

8 Tbsp salted or unsalted butter, cut into pieces
6 ounces bittersweet or semi-sweet chocolate, finely chopped
1/4 cup cocoa
3 large eggs
1 cup sugar
1 tsp vanilla
1 cup flour
1 cup dulce de leche

Preheat the oven to 350 degrees.  

Line an 8-inch square dish with aluminum foil that covers the bottom and reaches up the sides of the dish, hanging over the sides.  If one piece of foil doesn't do the job, use two and cross them.  Grease the bottom and sides of the foil with butter or non-stick cooking spray (I used Pam for Baking).

Melt the butter in a medium saucepan.  Add the chocolate pieces and stir constantly over very low heat until the chocolate is melted.  Remove from heat and whisk in the cocoa powder until smooth.  Add in the eggs, one at a time.  Then stir in the sugar, vanilla, and then the flour.

Scrape half of the batter into the prepared pan.  Drop 1/3 of the dulce de leche, evenly spaced in dollops, over the brownie batter, then use a knife to swirl through.  Spread the remaining brownie batter on top, then drop spoonfuls of the remaining dulce de leche over the top of the batter.  Use your knife again to swirl through.

Bake for 35 to 45 minutes.  The brownies are done when the center feels just-slightly firm.  Remove from the oven and cool completely.

The brownies taste even better the second day.  They'll keep up to 3 days, covered or in an airtight container.  Ours didn't make it that long so I can't really vouch for the timeline.


Thursday, February 17, 2011

Cranberry Sauce

So even though I made this cranberry sauce back in November for Thanksgiving, I still wanted to post it for two reasons: 1) this was the first time I'd ever made real cranberry sauce, and 2) I really liked the photos.  Even though I don't have photos of the end result, it was pretty.

Having never cooked with cranberries before, I had no idea that they'd start to split / pop as they heated.  I was a little nervous at first that I was about to cause some sort of explosion, but luckily the house we just bought is still standing.

This recipe was BEYOND easy.  Even though I came across it on Beantown Baker's site, it's the standard recipe from Ocean Spray.  I don't normally eat cranberry sauce at Thanksgiving because the canned gelatin stuff freaks me out.  But I love the flavor of cranberries and I really enjoyed this dish.  I was able to make it a day or two before the holiday and then just leave it in the fridge until we were ready to eat.  There's not much to say beyond this; when I say it's easy, I'm not kidding.


Cranberry Sauce
original recipe from Ocean Spray via Beantown Baker
makes ~ 2 cups

1 cup sugar
1 cup water
12 oz. fresh cranberries, rinsed and drained


Combine sugar and water in a medium saucepan and bring to a boil.  Add cranberries and return to a boil.

Reduce heat and boil gently for 10 minutes, stirring occasionally.

Cover and cool completely until room temperature.  Refrigerate until serving time.


Tuesday, February 15, 2011

Orange-Frosted Cranberry Cookies

Please forgive my delay in posting!  I have been having trouble getting my font consistent among/throughout posts, so my OCD has won out over the past few months as I tried to fix it.  It may not be corrected yet but I wanted to get some posts up, so try not to remind me if they don't look as perfect as I think they have to. :-)
 

Happy New Year!  We're now 1.5 months into 2011 and I still think about these cookies.  This became my go-to recipe this season and I think I made more than 20 dozen during the month of December.  I participated in the cookie exchange at work and because I had two pounds of cranberries left over from Thanksgiving, I wanted a recipe that would let me use those.  

Why did I have two pounds of cranberries?  Well, instead of buying the standard 12-ounce bag for a batch of cranberry sauce, Hubby decided that we needed to buy the 3-pound bag at Sam's Club instead.  It's things like 3-pound bags of cranberries that I try to avoid sending him to the grocery store by himself.

Anyway, when I was searching for cookies with cranberries I came across this Betty Crocker recipe on the internet.  It's delicious!  I made 10 dozen for the cookie exchange and then continued to bake them (using a second giant bag of cranberries) throughout the season.  I altered my recipe a bit from Betty's version, and I've reflected those changes below.  I stored some of the cookies in airtight tins/containers and they stayed VERY soft, but even the ones I left out for a few days didn't really get stale.

Lastly, if you don't have a cookie scoop I highly recommend one!  I have a running list of items on Amazon that I throw into my cart when I need free shipping, and this Oxo Medium Cookie Scoop was about $10 and one of the best baking investments I've ever made.  You fly through the batches and each cookie comes out the same size and bakes evenly.

A few tips:
  • Take your butter right from the fridge to the microwave and soften it until it's melting on the bottom and very soft (but intact) in the rest of the stick.
  • Use your food processor to chop the cranberries instead of doing it by hand.
  • Instead of dipping the cookies in the frosting, set the cookies up on a foil-lined baking sheet and use a silicone pastry brush to frost them.  Then put the baking sheets in the fridge for 10-15 minutes to help the icing set.  Leave the cookies out overnight to make sure they set the rest of the way.

Orange-Frosted Cranberry Cookies
original recipe from Betty Crocker's website
makes ~4 dozen

Cookies
3/4 cup granulated white sugar
1/2 cup brown sugar (packed)
1 cup butter or margarine, softened-to-nearly-melted
1 tsp grated orange peel
2 tbsp orange juice
1 egg
2 1/2 cups AP flour
1/2 tsp baking soda
1/2 tsp salt
2 cups coarsely chopped cranberries 

Frosting
1 1/2 cups powdered sugar
2-3 tbsp orange juice
1/2 tsp grated orange peel


Heat oven to 375 degrees and spray cookie sheets with non-stick spray, or line with parchment paper.

In a large bowl, beat granulated sugar, brown sugar, butter, orange peel, orange juice, and egg on medium speed (or stir with a spoon).  Stir in flour, baking soda, and salt.  Stir in cranberries.

Drop by rounded tablespoons onto the cookie sheets.  (My cookie scoop held 1.5 tbsp of dough, so I got about half the predicted yield.)  

Bake 12-14 minutes or until edges and bottoms of cookies are light golden brown.  Transfer to cooling rack for 30 minutes.

In a small bowl, stir together frosting ingredients until combined.  Use a silicone pastry brush to frost cookies with a thin coat.


Saturday, November 20, 2010

Fake Thanksgiving 2010

Back in August, Hubby's sister L got engaged and moved to North Dakota with her fiance, S.  He's a teacher and found a job there for this school year.  Obviously we don't see L & S very often now, so it's exciting when they come back to visit.  In mid-November Hubby's sisters L & M, and his brother R, are going to Europe for 2 weeks.  This means that they'll be gone for Thanksgiving, and with E & C living in Virginia we will be the only ones around for Thanksgiving this year.  L is coming in to PA a few days before going to Europe, so we've decided that we'll have fake Thanksgiving with everyone 2 weeks before the actual holiday.  

I offered to make something for dinner and Hubby's mom asked for a couple of pumpkin pies.  Easy enough.  But I couldn't leave it at that, so I went in search of a pumpkin pie that was a little bit different (last time we were in PA for Thanksgiving I made a 4-layer Pumpkin Cake).  So while I made two regular pumpkin pies using the classic Libby recipe, I also made a Streusel-Topped Pumpkin Pie, from Pillsbury's website.I ended up using the frozen deep-dish crust from Pillsbury that comes in the aluminum tin, all you have to do is fill.  This was easier for me because I am not entirely sure where all of my pie plates are packed...  I also omitted the orange zest from the topping because we didn't have any.  

The pie tasted great and I was glad I made it the night before, because sitting in the fridge overnight seemed to make the topping yummy.  It tasted like it held a lot of the moisture into the filling, which made the pumpkin taste really creamy.  I plan to make this again for real Thanksgiving, and I'm going to use more brown sugar and a little more butter in the topping so that the pie has more of the baked crumbly goodness on top.


Streusel-Topped Pumpkin Pie
originally from the Pillsbury website
serves 8

Filling
1 can pure pumpkin (15 oz)
1 can evaporated milk (12 oz)
1/2 cup sugar
2 eggs, slightly beaten
1 1/2 tsp pumpkin pie spice
1/4 tsp salt

Streusel Topping
1/4 cup packed light brown sugar
2 tbsp AP flour
2 tbsp butter or margarine, softened
1/2 cup chopped pecans


Preheat oven to 425.  If using refrigerated pie crust, unroll into a 9-inch glass pie plate.  If using the frozen crusts in the tin, keep them in the freezer until you're ready with your filling.

In a large bowl, mix the ingredients for the filling until well-blended.  Pour into the crust-lined pie plate.

Bake 15 minutes at 425, then lower the temperature to 350 and bake for another 15 minutes.  While the pie is baking, mix the streusel ingredients in a small bowl.

Sprinkle streusel over pumpkin filling.  Bake for another 15-20 minutes or until a knife inserted near the center comes out clean.  Cool completely, about 1 hour.  Serve with whipped cream or Cool Whip.


Saturday, November 13, 2010

The Great Pumpkin Cake

So I started this post on November 3rd, a perfectly reasonable amount of time after I actually made this cake.  Life is overtaking me!

On Halloween we headed to Hubby's parents' house for Sunday dinner.  His brother and sister-in-law were visiting from Virginia for the weekend and we hadn't seen them in a few months so we decided to make the trip for a few hours.  We hadn't done a family Sunday dinner in a very long time!  It was a great meal and so nice to see everyone.

I am on the Kraft recipes mailing list and received an e-mail on Friday night with Halloween recipes, and as soon as I saw the Great Pumpkin Cake I knew I had to make it for Sunday's dinner.  I had bookmarked this cake a long time ago but never made it, so this was a great reminder.  I later realized how awesome it is that I've gotten to a point in my cake decorating career that something like this is easy peasy for me and is something I can "whip up" on short notice.  I immediately had Hubby text his mom to tell her I would take care of dessert.  Kraft indicates "any cake flavor" for this recipe, so I searched their website for a good-looking pumpkin cake and used that.  I forgot to put in the chocolate chunks, but oh well.  It was still tasty!

Great Pumpkin Cake
originally from Kraft website for design and cake recipe
serves 16

Cake
1 pkg spice cake mix
1/2 cup water
1/2 cup oil -- I always substitute unsweetened applesauce for oil
4 oz (1/2 bar) low-fat cream cheese 
1 cup canned pumpkin
1 tsp ground cinnamon
1/2 tsp ground ginger
6 squares semi-sweet chocolate, coarsely chopped

Frosting
8 oz (1 bar) low-fat cream cheese
1/4 cup (1/2 stick) softened butter -- I always use unsalted butter when baking
4 cups powdered sugar
Red & Yellow Food Coloring -- I used liquid but you could also use paste
1 Comet Ice Cream Cone


Preheat oven to 350°F.  Prepare cake mix as directed on package, adding only the water and oil (or unsweetened applesauce).  Add the cream cheese, pumpkin, cinnamon, and ginger.  Beat on medium speed until well blended.  Stir in chopped chocolate.  Pour into greased 12-cup fluted tube pan or 10-inch tube pan. 

Bake 40 to 45 min. or until toothpick inserted in center comes out clean.  Cool 10 min.  Remove from pan; cool completely on wire rack. 

For the icing, beat cream cheese and butter in medium bowl with mixer on medium speed until well blended.  Gradually add sugar, beating until well blended after each addition. Remove 1/2 cup of the frosting; place in small bowl.  Add green food coloring; stir until well blended.  Spread half of the green frosting onto outside of ice cream cone; set aside.  Cover and reserve remaining green frosting for later use. 

Add red and yellow food colorings to remaining white frosting to tint it orange.  Spread onto cake to resemble pumpkin.  Invert ice cream cone in hole in top of cake for the pumpkin's stem.  Pipe the reserved green frosting in vertical lines down side of cake.


Monday, November 1, 2010

Pièce de résistance - part 2

Now, what I know you've been waiting for!

For L's bridal shower cake I made a 2-layer 9x13 marble cake with chocolate buttercream frosting.  These were two firsts for me, as all my cakes up to this point were 8-inch rounds with white buttercream.  I used yellow icing for the border and for the writing, and the gum paste flowers from Shop Bakers Nook.

Unfortunately I don't have any pre-decorated photos because at this point it was closing in on midnight and I just wanted to make sure I got it all done. 


The flower placement was definitely one of the more intensive pieces.  I was
very picky!  I love the date written around the curve of the petal.


On display at the shower, with cupcake placements.


Saturday, October 30, 2010

Pièce de résistance - part 1

Hands down the most exciting cake I've done so far was for my friend L's bridal shower.  L is the now-wife of my husband's friend A, and sister-in-law of my friend J.  (I'm noticing now it seems like we only hang out with these few people, but I swear we have a lot more friends than this.)

In late July I was contacted by A's mom and L's mom, asking me if I would make the cake for L's bridal shower at the end of August.  I couldn't believe that someone would ask me to decorate a cake for such a big occasion.  I happily accepted and started to plan out what I would make.  As I browsed the internet I came across gorgeous gum paste flowers from a website called Shop Bakers Nook in red, yellow, and white that looked just like the flowers from L's bridal shower invitation, so I decided that I would make a marble cake decorated to mimic the invitation.  In addition I would make Funfetti cupcakes so that L would have both at her shower (her favorites!).  Because this was such a big job, I'm splitting this into two posts to cover cupcakes and then the cake.

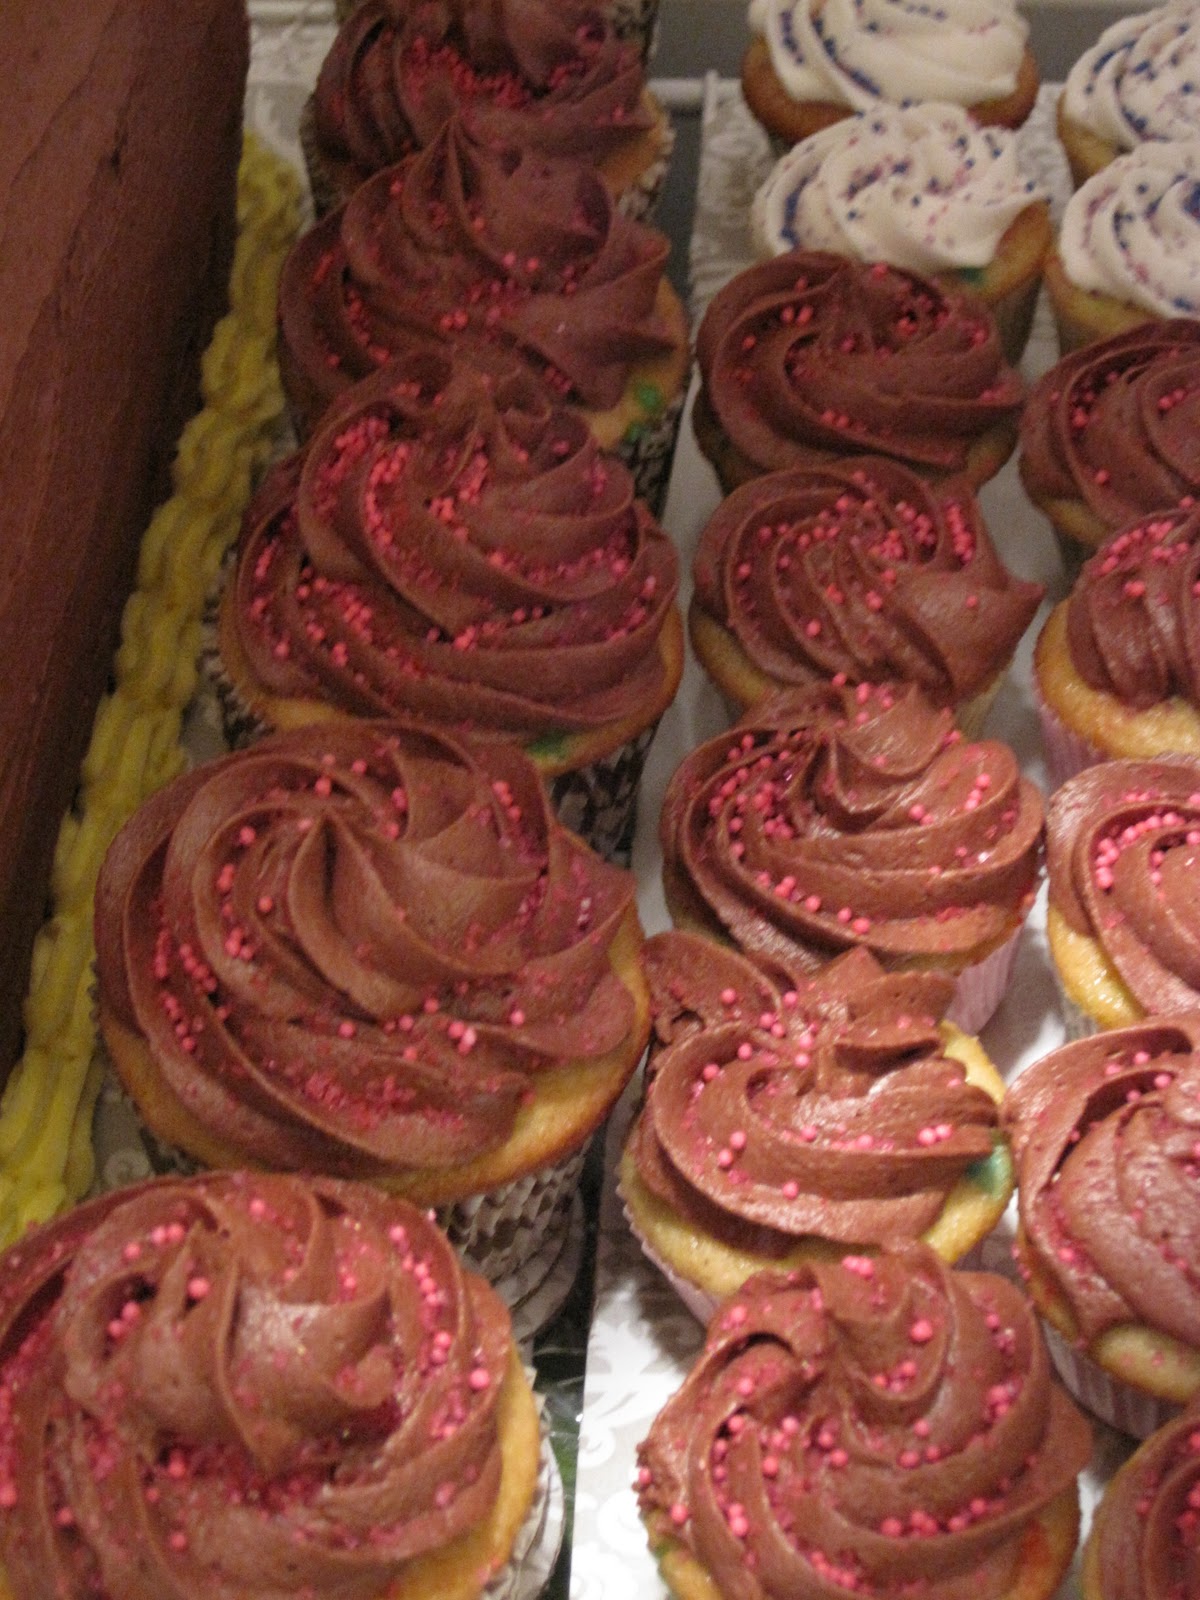
I took off from work the day before the shower so I'd have time to bake.  The weekend before the shower, Hubby and I were in Philadelphia for a wedding.  The week of the shower I was in NYC a few days for work.  I made a few batches of cupcakes the night I got home from NYC, and then the day I took off from work I baked from 9:00 a.m. through 1:30 a.m.  It was epic!  It wasn't easy by any means, and I'm very lucky that I have such a helpful and supportive husband who is willing to sprinkle colored sugar and sugar pearls onto about 6 dozen cupcakes as I iced.  We got everything done and I was so happy with what we brought.

Here is a look at a portion of my cupcake count.  I made about 2 dozen regular-sized and 4 dozen minis.  I had great paper liners I was excited to use, but I have to admit these pups were everywhere - kitchen table, counter, coffee table, etc. 


Below is my finished cupcake product.  When frosting I used a basic Wilton 1M tip.  This is by far the easiest way to knock out a bunch of cupcakes quickly while still ending up with a pretty final product.  I decided to do vanilla and chocolate icing to stick with the bride and groom theme; the chocolate icing had pink sprinkles and the white icing had purple sprinkles.


The cupcake stand is from the Martha Stewart line, found at Macy's for $20.  I was really happy with this cupcake tree because it's versatile - white, pretty, simple, and doesn't take up too much room. 


Tune in to the next post to see the cake!

Thursday, October 21, 2010

Father's Day in Deep Creek - June 2010

Every year my husband and I go to Deep Creek Lake in Maryland for a week with his family.  Even though it's only immediate family, it seems like we're increasing in number by the year.  There are six kids to start with, and 4 of the 6 have significant others that come along.  Then two of those four have one kid each.  This brings us to a total of 14 people in one house on the lake for a week.  Contrary to how it might sound, it's actually pretty fun.  And each of those two couples is currently pregnant with their second baby, so we'll be up to 16 people next year.  We may eventually have to do two separate houses!

Because we're vacationing with a small army, we can really pack it in when it comes to food.  Everyone brings a load of snacks, cereals, drinks, etc. to throw into the communal pot for the week and each night a different couple takes care of dinner for the whole group.  It's a big task when it's your night, but it's nice to know that you only have to do it once and that you're not going to spend a fortune on eating at restaurants for a week. 

When I was planning for our dinner this year I realized that our second night in Deep Creek was Father's Day, so I jumped at the chance to make that our dinner night.  It was a two-fold benefit - one, we got our night out of the way early and two, I got to decide on a really cool cake to bring for the three fathers in the group.  I spent about a week searching for different designs that were impressive yet realistic for a newbie, and eventually I had a light bulb - make a Steelers cake!  We're all huge fans and it would be fun to practice using piping gel to outline a pattern.  I used the standard white buttercream again, with devil's food cake.  I was really careful coloring the black parts of the icing, and while it wasn't pitch black like I wanted, it was definitely more important to make it edible.  Everyone really liked this cake and it was a great way to end our Father's Day at the lake. 


Tuesday, October 19, 2010

Memorial Day 2010

My first post-class cake was done for Memorial Day 2010.  We were headed to a barbecue in my husband's hometown, hosted at one of his friend's parents' house (this friend, A, also happens to be my friend J's brother).  Since I had just finished the Wilton class I decided to whip something up to take with us.  I used the standard Wilton white buttercream on a red velvet cake (so it was super patriotic once we cut it).  I was a little nuts about the stars not having lined up the way I wanted them to, but that's one of my OCD tendencies I had to ignore.

One of the things I was happy about is that my icing technique keeps getting better.  As I continue to practice, the icing gets smoother and more even, and while my shell border isn't as traditionally tight as I'd like, it's consistent.  It's not always important to do it exactly as you're taught, but as long as you keep it the same within your baked good it's usually no big deal.

For the stars on the top I made light impressions with a cookie cutter and then outlined them in blue icing with a round tip (I can't remember which one).  Then I filled in each star using red icing that I mixed with the no-taste coloring paste from the Wilton line.  When coloring icing it's important to remember that the brighter, more vibrant you want your colors the more paste you have to use, which can result in bitter-tasting frosting.  Luckily Wilton makes a few colors as no-taste.  Then I filled in a few areas of white space with three drop flowers.  The BBQ crowd seemed pleased with it and luckily we didn't have any to bring home.


Saturday, October 16, 2010

I'm off to a great start...

Probably one of the smartest things I've ever done is try to start a blog right before moving into a new house.  I'm a virtual Einstein when it comes to things like that.  How did I not realize that my weeks would become all about packing boxes and moving boxes and unpacking boxes and organizing stuff?  Anyhow, I haven't been able to do much new baking or any other culinary experimentation, but I do have my eye on some things that I hope to try soon.  Now that the functional pieces of my kitchen are (mostly) in-tact and I have my fancy gas stove/oven, I need to jump back in.

Until I do that, I thought it might be a good idea to regale you with some of my cake decorating.  Back in May I took my first cake decorating class with my friend J.  J and I signed up for Course 1 of the famous Wilton classes at our local Michael's store.  Now J is a culinary school grad and her mom has decorated cakes professionally for years now, but my experience was quite limited.  In Course 1 we learned the basics about making icing, filling bags, using the different decorating tips, and the beginner's techniques for decorating (borders, writing, etc.).  Below is a recap of the three cakes I made during this 4-week class, and in the next few posts I'll show you the cakes I made after that (and you'll see I've gotten a lot better).  J and I have been trying to take Course 2 for a few months now, but the instructor never has enough people signed up to actually teach it.  Hopefully it happens soon though.


Week 2 of class - my very first cake! 
My icing technique has gotten MUCH better.


Week 3 - already an improvement! 
I think this might have been my favorite.


Week 4 - the Wilton rose!
I definitely needed help but I think it came out well.